
A couple of years ago I put Ubuntu 5.04 on my old IBM Thinkpad 390X, it worked sort of OK but the sound was all messed up amongst other things so I gave up and went back to Win 2K. Recently I decided to have another go with Feisty (7.04), I had to use the alternative CD as the live CD required more RAM than the system could provide. As in most cases the installation went without a hitch and the poor sound, as well as some other other previous problems were now OK. Since the last try I had installed a wireless network and I really didn’t have any expectations of getting this to work. As expected Ubuntu didn’t even ‘see’ the installed PCMCIA wireless card that Win 2K worked with. But, I also had an old 3Com USB wireless stick (3CRUSB10075) lying around which I hadn’t been able to get to work on any PC or laptop running Win XP or Win 2K, so I assumed it was knackered, but what the hell I thought give it a go. Plugged it in and ‘bingo’ Ubuntu network manager popped up, saw the stick and promptly asked if I wanted to connect to my wireless network, success! I was even more surprised that this was a bog standard installation of Ubuntu with the included network manager plus I was using a previously useless USB wireless stick. This time I think Ubuntu is going to stay on my old Thinkpad 390X
Transferring music from cassette tape to PC with Audacity
I have a huge number of cassette tapes which have been languishing in a box unplayed for some time now. I always knew it was possible to digitise these and I had all the tools, but getting round to actually doing it was another matter. This is a simple run down of what I did. First the tools, if your PC sound card accepts external inputs (most do) then just connect any tape player (or LP player). In my case I used an old Sony Walkman. The software I used was 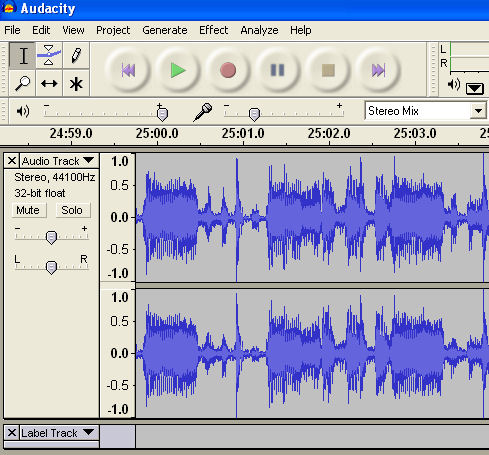 Audacity, an open source cross platform sound editor. Since Audacity does not encode mp3s I also downloaded the Lame mp3 encoder. I set the preferences under Edit>Preferences to 2-channel stereo and 32 bit float quality, then selected the source to stereo mix and adjusted the input volume to 0.2 to get maximum volume whilst avoiding clipping. With these basic settings all I had to do was insert a tape, hit play, click record in Audacity and leave for 45 minutes (one side of a C90 tape). Now I had to chop the single track into individual song tracks and there’s an easy way to do this with
  Audacity using a label track. Place the cursor at the start of a track and select Project>Add Label at Selection (or Ctrl-B). This produces a label track below the two stereo tracks with a red flag at the cursor which you can type the track title next to. Continue doing this for each successive track remembering to cut any long sections of noise between tracks.
  Now to export the entire project, select File>Export Multiple, this opens up the dialogue to select the format and location etc. You can then type the artist and album data which will be tagged to each mp3 file and will end up with all the individual mp3 tracks being save in the chosen directory.