Ever since Ubuntu 7.06 I’ve been using it on my companies corporate LAN and managed, after some digging around to get Evolution to connect to MS-Exchange server and manage all my mail, calendar and contacts. I am now using Ubuntu 8.04 and all was well until a couple of days ago, all of a sudden Evolution started crashing and even crashed X-server. Next thing I knew I could not get Evolution to connect to MS-Exchange at all it kept returning an error “Could not authenticate to server (password incorrect?)“. At first I put this down to a recent update for Evolution and did some digging around the forums, I found that many others had the same problem but there were no apparent solutions. I then read a few posts which suggested that Evolution did not work with Exchange server 2007, a quick check via web access to my mail and it certainly appeared that my company had updated from Exchange 2003 to 2007.
I had tried to use Thunderbird in the past but it connects to MS-Exchange server using IMAP and this was not available, so I was left with Evolution which connects using Outlook Web Access (OWA) and this was working fine…till now.
I tried everything with Evolution but eventually gave up, I did however discover an open source alternative in development called OpenChange which has an Evolution plug-in due for release in Gnome 2.24 so I might go back to this.
I thought it was a long shot to try Thunderbird again but if the Exchange server had been upgraded then perhaps IMAP connections were now possible, so here’s what I did.
There is a good explanations of the basics at downloadsquad.com, blog.indigio.com and McGill university. some of which I’d followed the last time I tried to use Thunderbird.
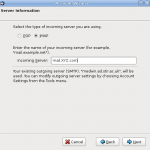
In Thunderbird select File>New>Account (if it hasn’t already prompted you to do so) and select new Email account, fill in your name (I used my LAN user name here) and email address. Next select IMAP as the server type , you only have the choice of POP or IMAP anyway. That’s the basic account set up, now you have to configure the server settings etc. Click on the account name in the left pane then select view settings for this account in the right pane. This gives you a whole load of things you can configure for your mail account but first thing to do is select server settings. Here make sure your server name is correct, usually something like mail.company.com. Under security settings the
  guides I’d read previously recommended setting this to ‘Never‘ but this just didn’t work for me so I tried ‘TLS, if available‘ and bingo, it worked. All the other settings are up to you. You’ll also need to input the correct address for the outgoing SMTP server. In my case I got this by going back into MS-Outlook and in the mail account properties you’ll see the server name. Also in my case this requires a user name in the security and authentication section and again I chose ‘TLS, if available‘. That is the basics of the account set up now I had to select which folders on my Exchange account I wanted to view. I did this by right clicking on the account name in the left pane of Thunderbird and selecting ‘subscribe‘ all being well this should open up a window showing all the folders available, just check those you want and click OK. I now had access to my Exchange inbox, sent and deleted folders.
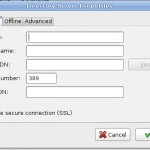
The next stage was to get the global address book connection. In Thunderbird click on Address book then select File>New>LDAP Directory.  Then fill in the details, I called mine ‘global address list’ the host name is usually the server name where your global address book (gab) is located, again this can be found out by going back to Outlook in Windows and looking at the properties of the global address book. So for example if the address was gabserver.ad.company.com then put gabserver in the Hostname box. In the Base DN box the rest of the address is added in the following format dc=ad, dc=company, dc=com The Bind DN is your DOMAIN\username and the port number defaults to 389 but this did not work for me, on blog.indigio.com they suggest port 3268 which did work for me. You should now be able to search the global address book and you’ll be asked for your password. You should also set up the global address book in the auto complete section in Edit>Prefernces>Addressing check the Directory Server box and you should see the address book you created before in the list. This means that as soon as you start to type a name in an email address bar Thunderbird will search your global address book for possible matches to auto complete.
Because I’d been using Evolution for some time I’d backed up a lot of email locally (~8000) as we have mailbox limits here so now I needed to get those into Thunderbird. I thought I’d just have to import but it wasn’t quite that simple. Thunderbird needs a plugin called MboxImport to be able to import emails in the Mbox format. Once this is installed it’s fairly simple though, select Tools>Import/Export in Mbox/eml format then point to the local directory where Evolution stores your mail (usually Home/Name/.evolution/mail/local), that’s it.
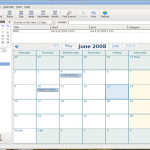
But what about the calendar? I here you ask, good question and so far it has me stumped. Thunderbird has a good calendar available as an Add-on called Lightning  but getting this to connect to the calendar on MS-Exchange is another matter and one I’m still struggling with. There is a solution posted at blog.indigio.com but this involves direct access to the mail server which I don’t have. I tried a few things like logging onto my mail through Firefox (OWA) right clicking on the link for the calendar looking at properties and using this address to set up a new calendar in Thunderbird. Click the Calendar icon in the bottom left then right click in the left pane and select New Calendar>On My Network>Next. There are three options ICS, CalDav and WCAP, none of which worked for me at all, but you may have more luck. I’ll keep looking and maybe I’ll find a solution or maybe if the Evolution plug-in is finished soon I may go back to Evolution. I have to say that given a choice I’d go for Thunderbird over Evolution but the fact is whichever one I can get to work with MS-Exchange is the one I’ll go for and for the time being that is Thunderbird, albeit without a calendar connection.
%8Fv%91%92q%1D%7D%12%88%98%99%9A%1B%9C%10%88%89%9Fy%93%A2%86%1A%9E%A7%8B%8C%2F%AB%18%A5%AE%A0_%AA%8E%AC%90%B5%B6%60%19%A3%0D%AD%BC%AF%A1(%B2%9D%BB%C3%C4h%BF%C7%A4%C9%CA%A8%A9A%CE%0E%B4%D1%BD%7B%10%C0%0A%C2%D8%D2%C5%DB%D5%0C%D7%DF%CB%B7%13%B9%C8%97x%02%EE%02%2B%B0%D47%13%DEln%1E%EF%EF'%F2%2B%F6Zd%3A%E8%1Bhb%9A%3Fv%F7%DAp%18%C8%90%84%C1%13%D0%C6%94%CB%C0%B0%E2%08f2%14%02%2Ce%8A%FFb%C5%86U%B4%B5(%B3%91%A3%C0%8F%20%CD%CD%E2%08h!%CA%94*%AD%B1l%99%EF%25%C1%98%0Bf%D2%1Ca%F3fL%9D%F8X%F4%D4g%0EhG%17C%F7%0D3%EA%23%A9%3B%5EL%818u%054%C9P%AA%2C%DF%D8%C4%FA%8F%CAK%AE%08%15Y%AC%15%F6%13%D1%A5%3Bq%AA%5D%CB%B6%AD%DB%B7p%E3%CA%9DK%B7%AE%DD%BBx%F3B4%DA%F5%1B_a%7F'%16%0D%0C%89%B0%E0h%86%13%F3%FD%A9%B8qV%95%8E%23%F7%85*%D9Me%B5%97%BB9f%1BY%AF%E7%CF%A0C%8B%1EM%BA%B4%E9%D3%A8S%AB%C6A%92r%D0Se1%C5~s8P%ED%24%26a%DF%1E2%13%EC%E4%1CUu%F7%06%12%D5wn%E0%C1%5D%0F%9FQ%1Cq%F2%83%3A1%3FO%F8Xzt%EA%C7%DB6%AFs%5D%EE%F4%95%D5%25%BEv%D1Z%7Cv%F0%BB%EB%05%CC%B8%DERz%99%BF%D5kd%11%91%C3y%F9%F3G%D4%2F%B1%DF~%FF%08%BC%F9%E9%F7_I%EDaW%12t%01%3EP%DE3%B3%B9g%DB%80%9A-%A8%20%84%8CAha%7C%90Q%A8!%85~a%B8!%87%CE5%18%8C%88%E4%80%88%16%89%25%26%C8%A0%8A%19%A2%98%93%8B%11%B2%D8!%8C1J%08%A0%89%9F%BC%97b%81%F8%C9x%A2%8F%F0%F1%D8%A3%8D%CA%E8%B8%23%91%2B%02)%9C%92%232y%24%92%C6%A55%E4x~%E0H%9B%95%04%60%89%A1%22%5B%06%09%E5%8D4%9Aa%A4%97RNY%26%97X%D6x%E6%3ANv%91%A6%9ATr%D7%26%15of%19%26%99q%E6(%A4%7Fs%929%E3Q%EE%7D%89%1Eiu%AAVhj%87%A2%96%E8i%8B%9A%D6%A8%A3%7B%AE%C6'%A0%AE%24%00%00!%F9%04%05%05%00%04%00%2C%0A%00%02%00W%000%00%00%03%FFH%BA%DC%FE0%BE%40%83%BC8%EB%3D%2B%E5%60(J%9E7%9E(WVi%EBv%EB%2B%BF%EB7%DFgm%E1%3C%A8%F7%23%81P%90%FA%A1%00H%40k8D%19G%C9%24%8A%C9%CC%D5N%D1%E8%89%DA%1C%3DCYi%90%2B%F4%5EEa%B1%88%DC%F5%9DAi%F5%9A-%FAn%E2%CA%14%9B%E8%8E%C1%E3.%7B!v%19x%2F%82*o%1A%86%87%88%1A%84%12xy%8Dd%89~%8B%803%7B%7C%19%90%10%928%8E%18%9E%0F%8C%A1t%9D%8A%91%99%3C%A2%24%AA%11%A6%AD%A8%17%A4%0C%B2%B3%B4%11%B6%0A%A0%40%0A%AE0%25%18%B8%3D%9B%B5%B0%0D%BE%BF%C0%BA%10%97%B1%AC%10%03%D4%03%81%CE%C2%C4%D2%0F%D5%D5K%D8G%DB%0D%DD%E4z%952%E2%E3%E4%E5c%5C3%E9%0C%EB%F2%EDm%E8Y%18%F2%F3se%3CZ%19%F9%FA%98%09%04%18P%E0%2F%82%EB%0C2C%C8N!%10%86%DD%1C%1E%84HMb%0F%8A%15-%F2%C0%A8%F1%13%22%C3%8E%0F%09%82%0C%99o%E4%C4%86%26IZK%A9!%01%00!%F9%04%05%05%00%04%00%2C%1F%00%02%00W%000%00%00%03%FFH%BA%DC%FEKH%01%AB%BD8%EB6%E7%FE%60%A8u%9Dh%9E%22%E9%A1l%5B%A9%92%2B%CF%04L%D1%F8i%E7%7C%B8%F7%A2%81p%C0%FA%9D%02%C8%40k8D%19E%C9%24%8A%C9%D4%C1%8EQ%A9%89%DA4%3DAYm%90%2B%F4%5E%A1a%E4%89%DC%05%7D5i%F1%98%9C%3A%83%E3K%B6%CF%BE%89%2B%F3tn%7Cpx.lD%1Fo%17~3%87%88%23%83%8B%8C%8Dz%1B%8A%15%93%94%95%19%97%0F~%7F4%87%96%91%98%859%A2%9C%A4%9E%A6%A7%9B%17%9D%0D%99%3C%A8%AF%AA%B1%AC%B3%B4%2F%B6%0B%9F%40%0B%BA%10%B0%0A%B2%40%8E%B5*%92%B8%C6%AE%C2%24%18%C5%BF%04%C1%0F%25%CAa.%00%DA%00%18%D4(%D1!%DB%DB%DD%812%CB%20%E2%E9%17%CD%2C%E7%1A%E9%F0%E4U8%D8%22%F0%F7%19%F39Q%26%F7%F8%D2%D2%FC%FD%03%D8C%E0%40%828%0C%C6C%C8C%A1%3A%86%09%1D%8E%83HC%E2D%8A3%2Cj%C3X%D1%14%22%C7%88%0A%3F%E6%08)r%A4%C0%92%05%17%A2L%B9%D1D%02%00!%F9%04%05%05%00%04%00%2C%3C%00%02%00B%00B%00%00%03%FEH4%3C%FA0%CAI%AB%9D%AD%DD%CD%7B%CD%99'%8E%16%A8%91hj2i%3B%AE%8E%2Bo%F0l%7F%EB%ADG%B5%2B%FC%82%DD%A3%97%02%02%85%8B%5C%D1x%DC%11I%CC%A6%EE)%8AJo%D4%8E%F5j%CBr%B6A%A1%F7%02F%26M%D0%ADy%5C)%AF%95Z7%92%3D%91%CF%E1%1Bp%F8%8D%8E%5B%CDCx%16v%7C%20~Q%80%81%7Ddj%89%0At%0Az%8E%8F%82u%8D%93%90%92%93%94!%8C%7F%9B%8A1%83%97.%01%A6%01%3B%84(%A7%A7%3A%A4%AB%AC%AC7%AF%22%B1%B6%AEL)%B6%BB%A9%5C%1E%BB%BC%A0%1B%C0%C1%C2%15%C4%C5%C6%12%C8%B7%CA%14%CC%B1%CE%13%D0%B2%D2%11%D4%AD%D6%D7%D8%A8%DA%10%DC%DE%CB%D0%E1%D3%C8%E4%CF%C4%E7%C7%CD%EA%EB%A6%ED%F0%F1%F2%F3%F4%F5%F6%F7%F8%F9%FA%FA%00%FD%FE%FF%00%03%024%26%B0%A0%C1%7F%A0%0E*4%B8i%A1%C3%81%93%1EJ%04%D0p%A2%C3%84%16%0F%12%CC(%03PA%02%00!%F9%04%05%05%00%04%00%2CN%00%0A%000%00W%00%00%03%ECH%BA%BC%F3%A3%C9I%2B%85%D0%EA%7Dq%E6%E0%E6%7Da)%8D%A4%A9%A2%A9Z%B2%91%BB%B2%B2%0B%D7%E6%8D%87p%BCs%BA%9F((%B4%10%8B%1D%14r%A8%5CV%8ENF%2F%9A%1CQ'%D3k%03z%E5%AA%04%60%81%91%B6%0B%87%9F%CD%9Ay%5D%C5%A8%D7%EC%B6%CF%04%AF%8F%1F%B2%BA%9D%AA%DF%3B%FB~H%80p%7C%83fQ%86%87%7F%89%60%85%8C%8E%86Z%89Z%0A%83%94%0B%80%97%0C%81%9A%95g%9D%A0%A1%A2%A3%A4%A5%A6%A7%A8%A9%AA*%01%AD%AE%AF%B0%B1%B05%B2%B5%B6%AF.%B7%BA%B6%AC%BB%BE%B8%26%BF%C2%01%BD%C3%BB%B9%C6%B7%B4%C9%B2%AB%CE%CF%D0%D1%D2%D3%D4%D52%00%D8%00%A5%D9%DC%A2%DC%DF%DA%9D%E0%DF%E2%E3%E4%94%E6%E3%E8%E9%E0Z%EC%ED%EE%EF%DD%F1%F2%D8%F4%F5%EB%F5%E1W%FA%FB%FC%F8%F9%D8%95K%17%8A%A0%B7s%A3%E6QH%00%00!%F9%04%05%05%00%04%00%2CN%00%1F%000%00W%00%00%03%E9H%BA%DC%FEn%C8%01%AB%BDmN%CC%3B%D1%A0'F%608%8Eez%8A%A9%BAb%AD%FBV%B1%3C%93%B5v%D3%B9%BE%E3%3D%CA%2F%13%94%0C%81%BD%231%A8D%B6%9A%8F%1C%14R%9B%F2L%D6%AB0%CB%EDz%BF%E0%B0xL.%9B%CF%5C%81z%CDn%BB%DB%B3%B7%7C%CE%5E%D1%EF%F3%13~%0F%1F%F1%FF%02z%80%7Bv%83tq%86oh%8B%8C%8D%8E%8F%90%91%92%93%0A%01%96%01f%97%9Ac%9A%9D%98%60%9E%9D%A0%A1%A2%5D%A4%A1%A6%A7%9E%5C%AA%AB%AC%AD%9B%AF%B0%96%B2%B3%A9%B3%9FY%B8%B9%10%00%BE%00%2F%B8%15%BF%BF%C1%B0%BD%C4%C5%C6%A7%C8%C9%C07%CC%0F%CE%CA%D0%A5%D2%D3%CF%3B%B1%C3%D8b%D8%BE%DE%DDa%DF%D9_%DFc%E7%E3%E2%EA%D3%E1%EB%E6%EF%5E%E4%EE%CE%E8%F1%5D%E9%EC%F5%FA%FB%60%F9%FE%ED%E8%11%23%D3%CF%1E%B8)%09%00%00!%F9%04%05%05%00%04%00%2C%3C%00%3C%00B%00B%00%00%03%F9H%BA%DC%FEP%8DI%AB%BD6%EA%1D%B1%FF%15'r%60%F9%8D%E8c%AEY%EAJl%FC%BE%B1%3C%BB%B5y%CF%F9%B9%FF%C0%A0pH%2C%1A%8F%C8%A4r%C9l%3A%9F%D0%A8tJ%10X%05%D4%D7u%9B%1Dm%BF%D8%AE%06%FC%15G%C8%60%B3%03MV3%D8mw%15%5E%96%CF%E9W%FB%1D%1Fv%F3%F3v%7FVz%82F%01%87%017%7FD%88%88%8AxC%8D%8D%3Bt%91%92%87%40l%96%97%89%99u%11%00%A1%00%1C%9C%98A%5C%1A%A2%A2%A4%A5O%AA%AA%1B%A5%A6L%AF%AB%B1%ADM%B5%A1%AC%B8K%BA%A3%BC%97%B9%BA%23%B2%B4%C4%22%C6%BE%C8%C9%BDH%BF(%B2%9D%CF%CC%CD%9CJ%D0%D1%CAG%D9%DA%D7%D4%B5%2F%DBE%DD%DE%C2%DC%D5%E6%92%E8%E1%E2%E3B%E5)%EFA%F1%F2%DFD%F5%EA%8E%E4%E9.%E7%FC%EDvLb%F7J%8F%83%7Cv%10%CAQ%E8%86%A1%1A%87%0F%0B%1A%7C%00kb%83%04%00!%F9%04%05%05%00%04%00%2C%1F%00N%00W%000%00%00%03%FFH%BA%DC%FE0%CA7%EA%988%EB%CD%89%FD%5D(%8E%CDg%5Ed%AAJ%A7%B9%BE%B0%D7%BAq%1D%CE%AD%ADkx%BE%FF%90%DE%09Ht%08i%C5%E4%11%94%2C.-M%E5%13%15%05N5%80%2C%E0'%E8%0AFO%8CV%AB%F3z%C1%C7%C9x%5C3%9BIB%F5%3A%DBvwU8%C9%9C%1C%B3%9F%F1H%10%7Bt%13%01%86%01%18~w%2BL%11%83%5B%85%87%86%89%8AQ%8F%90%11%92%92%13%8A%8BE%8F%18%9A%87%94~I%97%A1%A2%88%9C%9D%9F%83%19%A9%AA%AB%A5%40%A0%AF%A9%1A%AC%3F%B5%A8%A2%B8%95%3B%BB%BC%9A%1B%B95%A7%1A%B0%C4%C50%C1%C2%9B%CA%B3%CC%CD%91%BD%D0%D1%2B%D3%D4%C3%1C%CB)%D9%DA%CF%DC%BF*%DF%12%C9%1D%DD%22%E5%E6%B7!%E9%1C%C7%1D%E7%E8%EFX%AE%22%F3%F4%D7%1D%F7%F8%ED%22%E3B%F4%0B%91O%9F%1BokR%144%E8%89%04%1B%85%FFF%BC%A9%E2l%14%C5(%0B%2F%FE%C8%A8Q%13%07%C7%8E5%3E%82%84!r%E4%8Bj%26%89%84K%A9%20%01%00!%F9%04%05%05%00%04%00%2C%0A%00N%00W%000%00%00%03%FFH%BA%DC%0E%10%B8I%AB%BD8%B7%C8%B5%FF%E0%C7%8DRh%9E!9%A2lK%A9%A4%2B%B7%B0%3A%DF%60m%E3%3C%A6%C7%BD%E0%E4%B7%12%1A%17%C4%CEq%99%8C%2C%8FM%C8%13%DA%9CR%89%A7%806%20%1Cx%07%99dv%AB%ED%7D%BF%3E%1D%8AL%C6%9D%CF%97Z%8B%BDu%BF%BDi%25%8B%5E%BF%DD%D1qN.%7Ce%17%02%87%02%18%7FxV%04%84%5C%86%88%87%8A%8BV%8F%90%15%92%92%17%8B%8CK%8F%18%9A%88%94%7FO%97%A1%A2%89%9C%9D%9F%84%19%A9%AA%AB%A5F%A0%AF%A9%1A%ACB%B5%A8%A2%B8%95A%BB%BC%9A%1E%B98%A7%1A%B0%C4%C53%C1%C2%9B%CA%B3%CC%CD%91%BD%D0%D1%83%AE%1F%C9%1F%CB%7B%D9%DA%B7%20%DDc%7C!%DB%DC%BF%DE%E5%E6%E1%E2%E9%26%C7%20%E7%E8%EF%20%D3%C8%ED%EE%D7%F6%EB%26%F3%FAo%D6%F4cW%CDD%3D~mP%FC%03%E8I%60!%85%F9%0C%02jDm%18E%2B%0B%2F%0A%C9%A8%B1%12%07%C7%8E8%3E%82%9C!r%A4%8C%82%26%8D%3C%E3%91%00%00!%F9%04%05%05%00%04%00%2C%02%00%3C%00B%00B%00%00%03%F5H%04%DC%FE%F0%A9I%AB%BD%98%C6%CD%5D%FE%E0%D5%8D%5Ch%82d*%9D%AC%A5%BE%40%2BO%B0%3A%DF%F5x%EF%F9%B6%FF%C0%A0pH%2C%1A%8F%C8%A4r%C9l%3A%9F%D0%A8tJ%3D%05%AE%81%AA%0C%CB%D5%9A%B8%E0%AC7%13%06%8F%2F%E5%F0%99%92.%AF%09m%F7%3A%AE%3E%D3%CD%F6%3B%F6%AD%DF%E7%FB%7C%80%81w%3B%02%86%02Fz%85%87%86Et%3F%8C%8CDmA%91%87%8Ex%40%96%97%98WC%9B%8D%20%03%A3%03R%A0%88%A2%A4%A3P%A7%A8%19%AA%AAO%A7!%B0%A4N%AD%B4%B5%A5M%B3%B9%B5%BC%A0'%BA%BBK%BD%BE%B0L%C6%C7%B1J%B8%C2%BA%C5%C1%2C%C3%CD%CA%CB%B6I%D6%D7%ABH%DA%DB%C4F%DE%A9%BFG%E2%E3%C8%E1%E6%1F%D4%E9%9B%3B%ECE%D27%F0D%F23%F4%F5%91%40%F8%F9%A1%3F%FCo%26%00%0CH%60%60%40%83o%10%AEQx%86aCt%0410K%00%00!%F9%04%05%05%00%04%00%2C%02%00%1F%000%00W%00%00%03%E7H%BA%0C%0E%2C%CAIk%7B%CE%EAM%B1%E7%E0%E6%8Da)%8D%A8%A9%A2%A9Z%B2%AD%CB%C1%B1%AC%D1%A4%7D%E3%98.%F2%0F%DF%0E%08%11v%88E%E3%04%A9%AC%00%9B%16%1C4%0A%9B%0E%7B%D6_%26%CB%EDz%BF%E0%B0xL.%9B%CF%A1%80z%CDn%BB%DB%B6%B7%7C%CEv%D1%EFs%15~%0F7%F1%FF%01z%80%7Bv%83tq%86oh%8B%8C%8D%8E%8F%90%91%92%93h%02%96%02f%97%9Ac%9A%9D%98%60%9E%9D_%A1%9E%5D%A4%A1Y%A7%A8V%AA%A5S%AD%A2%AF%B0%97%A9%B3%96%AC%B6%9F%B2%B3%5C%B62%03%C0%03%16%BC.%C1%C1%15%AD6%C6%C6%14%A7%3E%CB%C7%CD%B1%3A%D0%D1%D2%B7B%D5%C0b%DA%C2a%DD%DE%60%DD%DC%E3%DF%DA%E4%D5c%E5%E2%E7%E6%ED%EC%E9%EE%F1%F0%D0%E8%F5%F6%CB%F8%CC%F2%F7%F4%F9%FA%DB%D4%CD%D3wf%9F%86%04%00!%F9%04%09%05%00%04%00%2C%02%00%02%00%7C%00%7C%00%00%03%FFH%BA%DC%FE0%CAI%AB%BD8%EB%CD%BB%FF%60(%8Edi%9Eh%AA%AEl%EB%BEp%2C%CFt%0A%DC%40%AD%938%BE%FF%9E%5E%0FH%CC%08%7D%C5%24%E5%88T%3A%1D%CC%E6sJ%88%E6%A8X%2B%96%AA%DDN%BB%5E%A5%F5%1AN%82%CB%C41%DA%1C%5D%B3%99%EEt%3B%0E%3C%D3i%EA%BB%CE%AE%8F%E5%FB3%7C%80%12%01%85%01!%82%83%0E%86%86%20%89%8A%0B%8C%92%1Fs%90%10%92%98%1D%95%96%8B%98%99%1BG%9C%11%9E%9E%1CC%A2%A3%A4%9F%A8%26%AA%A5%AC%AD%AE%93%B0%24%B2%B3%B4%23%B6%8C%B8%B5%BA%85%BC%22%BE%BF%C0!%C2%C4%C1%B6%C7%B9%AE%CA%CB%A4%CD%BD%B7%D0%CE%87%D3%D6%D7%D8%D9%DA%DB%DC%DD%DE%DF%E0%E1%C0%02%E4%E5%E6%E7%E8%E7%DC%E9%EC%ED%E6%DA%EE%F1%ED%D9%F2%F5%EA%D8%F6%F9%02%F4%FA%F5%F0%FD%EE%D6%01L'%AE%A0%C1%83%08%13*%5C%C8%B0%A1%C3%87h%06H%1C%00q%C1%C4%8B%10%2Fj%A4%D8pP%A3F%86%1E7*%0C%E9%11!%C9%92%07O%8A4%A8%F2%23%CB%96%13M%C2%94%98r%26%C7%970%13%CE%5C%98%93%E7I%87%24%2B%AE%ACH%00%23%D1%A3H%93*%5D%CA%B4%A9%D3%A7P%A3J%9DJ%B5%AA%D5%ABX%B3j%DD%CA%B5%AB%D7%AF%60%C3%16I%00%00%3B)
Loading image
Click anywhere to cancel
![]()
![]()


